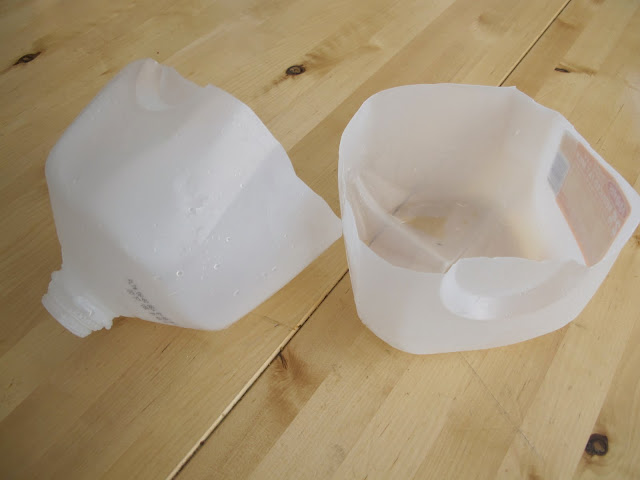
I had to do the first couple of stages which required some stabbing and cutting of the milk jugs. Then the kids took over when it was time to add the tentacles. I slaughtered a milk jug, cutting it in half at the bottom of the handle. Then I put the top part aside (NB: we made up a game later on called COW CATCH which involved tossing a cow webkinz back and forth in the top half of the jug - more later on that silly game).

I took the bottom piece and cleaned up the edges with scissors, cutting it in a slightly wavy pattern. I made sure there were no sharp bits to snag on fingers or yarn. Then I took a hole punch and made holes all the way around the edges at about 1 inch intervals.
I taught the girls how to make a slip knot by taking a doubled piece of yarn and pushing it through the hole in the jug, then bringing the ends of the yarn through that loop and pulling it tight. They mastered it immediately and did all of the knotting themselves. I just made sure to hand them each length of yarn already doubled so they could see the loop easily. I cut long pieces of yarn for them from my stash. I didn't measure, but I'd say most pieces were about 4 to 6 ft long and then doubled they trailed quite a bit. I tried to vary it as much as possible, with thick and thin pieces. Some extra bulky and some very fine.
When they had worked all the way around we filled in any gaps by punching a few extra holes until it looked nice and tentacly! I thought you could also add some bells inside it for a bit of a windchime effect... or take sharpies and color the plastic if you wanted to. But ours stayed plain because the girls couldn't wait to play with them.
When they were done, I cut two slits in the top of the jellyfish with an exacto knife. Then I pushed a piece of yarn about two feet long down through one slit and up through the other one. I used a plastic sewing needle, but this isn't strictly necessary (though it did make it a lot easier to get the yarn through without pinching my fingers). Then I tied the yarn ends together and made a large loop for hanging the jellyfish or for flying it if the girls wanted to use it as a puppet, which of course they did!
I have to say it looks pretty amazing just dangling on our back patio. And this jelly is totally sting-free. :)
UPDATE: My husband suggested tonight that we replace the piece of yarn that the jellyfish hangs from with elastic to give it a bouncy jelly effect when you tug on the yarn tentacles. BRILLIANT. I love when people contribute and make my ideas even better. And you know if you don't have enough yarn, ribbon would look just as lovely. And if you are a knitter, then some unravelled yarn from an old project would look wonderfully wavy and just like the real thing...


I am going to do this with the boys!! Thanks Eden, I just love your ideas. I grew up with a mom who was into about 50 different types of art, so I had always enjoyed this while growing up. . . and I think I have managed to hang onto enough of that creativity to make these projects work with my kids. (from Colleen)
ReplyDelete